Mission Maker Tutorial
So... I've been thinking about it for a long time... so many have asked me... let's do a tutorial...
It will not be anything super professional, more than anything else I will try to explain to you everything I have learned about Mission Maker by doing my missions.
(And I don't want to be responsible for all the missions you break in the future, if I can help I gladly do it, but I don't want responsibility)
So let's start.... open the editor, after installing it F10.
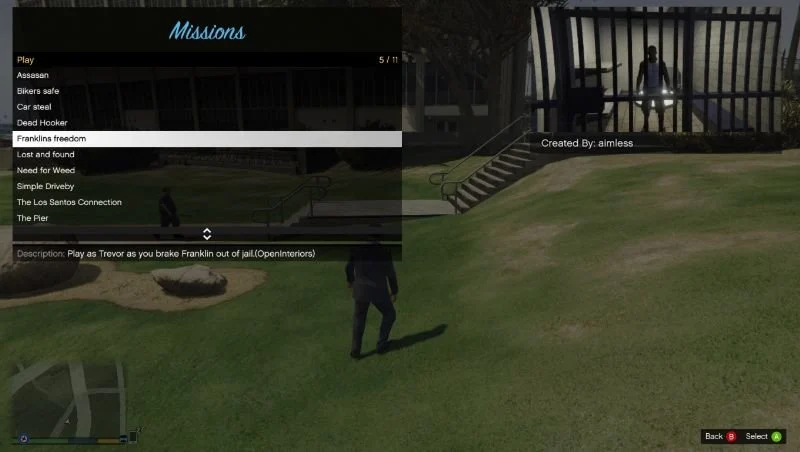
Play mission to play a mission, Edit Mode to create missions.
The buttons are:
- Down arrow key down open menu.
- W/A/S/D Move forward left backward right.
- Q/E rotate actors/vehicles.
- Ctrl/B Up and down hight for setting props exc.
- U toggle on ground/free mode.
- X/C Placemet position further/closer (on ground). zoom in out (free mode).
- NUMPAD8/NUMPAD2 Placemet position further/closer (free mode).
First mission
The first mission, the simplest one you can do.
Simple, easy, but there are probably some things you haven't noticed already.
For example the filename, I always start with u1, then u2, u3... v1, v2... x1, x2, etc, to always have the last file at the end, this is because it simplifies and speeds up a lot managing and load and unload mission, and for other reasons that I will explain later.
Before testing a mission you have to save and unload the mission otherwise some strange messes start to happen, the sequence is: save, unload, exit, play. Get used to doing it in this order and everything will work out.
Then this:

and what does it do? It shows you this:

This tells you where you are, and when you want to add an actor, vehicle, text, message, etc., you need to know where to add it.
Because in simple terms what Mission Maker does is create a sequence of objectives that the player will have to overcome one by one to get to the end of the mission.
Objectives
The objectives can be of different types:
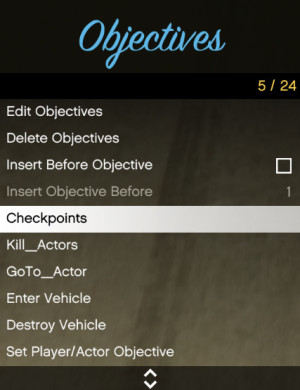
In this first tutorial we will try to see at least the main ones, the objectives inside have many functions:
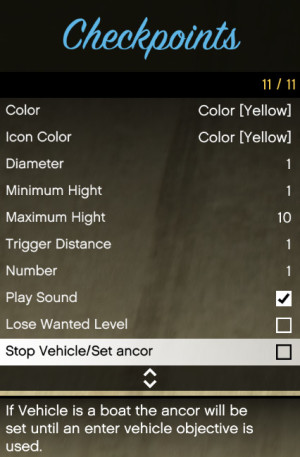
we'll cover the basics for now. But know in advance that not all functions are available at the first insertion, many objectives will have to be edited to see all the functions available.
So if you are looking for an option and you can't find it anymore, try to edit the objective and you will see that often the list changes.

The player
Always, for start, the first thing you will always need is the player. The player defines where the mission will start from, with which peds, which customizations he must have, which weapons, etc., etc., etc.
The player must first be inserted, then customized. Weapons can also be added later, can be moved using Actors -> Edit Actors Position.
Actors
Very often the objectives need something else to work, for example GoTo_Actor needs an actor, to add Actors, Vehicles, Props, Pickups etc, there are special menus.
Actors also have the possibility to modify many features and options, among the most interesting:
- Add Blimp, you need to know where the actor is.
- Invincible, which is used very often otherwise you will always end up alone.
- RelationshipGroup, defines what kind of relationship the player has with the actor, Neutral is neutral, Companion follows you, Friend does not follow you but helps you if someone tries to kill you, Enemy try to kill you (later we will see why there are several enemys).
- Task, allows you to do an infinity of things that we will see later.
Actors appearance can also be customized, but only during insertion, afterwards you can change almost all options, but not the appearance... so choose it now.
The options and position can be changed in the appropriate menu.
Vehicles
The vehicles are also very similar, they have their own menu for insertion and modification and can interact with the objectives, for example EnterVehicle objective.
Messages
Messages are currently the only way you can get characters in your missions to talk.
At first glance it looks like a very complicated menu, but it's not. The first thing to understand about the messages is that they are activated on the objectives, so the counter of the objectives I mentioned at the beginning is very useful, to understand when a character has to say something.
And you can for example activate them in a objective after a certain time, which allows you to create for example complex discussions.
Everything always starts from the activation of the objective, for example in this case the first message is activated at the beginning of the objective, the second with a delay of 2 seconds, the third with a delay of 4 seconds, the whole message sequence lasts about 6 seconds.
The colors you can use in the texts are these:
^r^ = Red
^b^ = Blue
^d^ = Dark Blue
^f^ = Light Blue
^g^ = Green
^y^ = Yellow
^p^ = Purple
^o^ = Orange
^c^ = Grey
^m^ = Darker Grey
^u^ = Black
^s^ = Default White
^w^ = White
^h^ = Bold Text
Commands:
^n^ = New Line
Fonts: (toggle)
^italic^ = italic font
^bold^ = bold font
Conclusion
I'd say that's enough for now, with this first information you can already start creating your own little missions, taking a look at all the options and understanding how everything works.
Have fun, see you in the next tutorial where we'll take a little more detailed look at the objectives.
I leave you with one last prayer, Mission Maker can do many things, with messages and with a little imagination it can create entire environment, tell stories, involve you in an adventure. So please, please, please don't create missions that are just a list of instructions to follow. There are already a lot of them and they are really boring.
Need help?
There's a Discord... https://discord.com/channels/466944911820980224/469165508772495380Latest missions help
alebal3 -> alebal3 001 - Clay
Hello author, may I ask why I am unable to download old tasks after purchasing Pack3? All old tasks cannot be downloaded, and the wrong website is displayed, only Pack4 can be downloaded. Can you please answer this question? thanks
BANDAI36 - 2024-03-13 16:27:01
alebal3 -> alebal3 001 - Clay
Hi, I didn\'t know where to ask, but I just bought the full version of pack 3 and it won\'t let me download, it shows a website not existing thing. I got the pack4, but i\'d like to play 3 first \"sice what now?\" and pack 2 are not working for me. help plz
Raul7dr - 2024-02-11 18:57:01
Stay in touch
Leave your email to be notified when new missions are published.
Latest missions
Ads
Ads
How to install
Need help to install the missions and Mission Maker?
Download Mission Maker
You need Mission Maker by aimless to play the missions, download the latest version.
If you need help installing, follow the instructions in the video above.
Follow us


Support us on Patreon